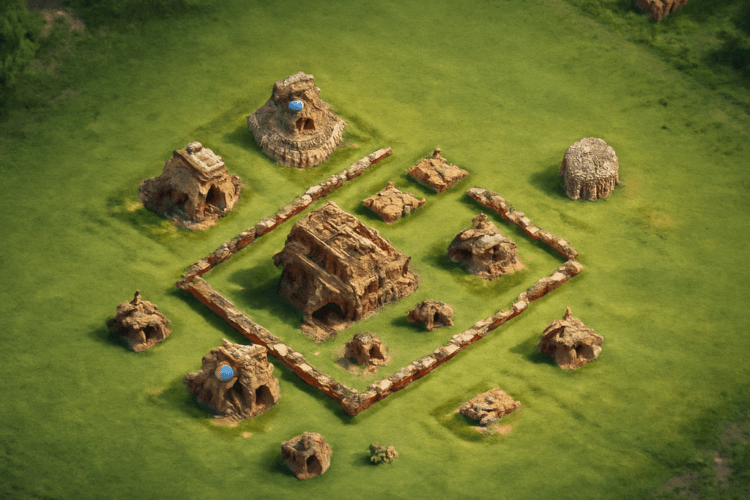
Build a compact core around your Town Hall, Mortar, and Air Defense, then give the two Archer Towers clear coverage on opposite sides. The Town Hall 4 village arrangement below uses all 75 available walls and leaves room for traps. Follow this level-four village layout in the Home Village editor; it is a hybrid design for protecting the Town Hall and some stored resources during ordinary multiplayer defenses.
This is Clash of Clans Home Village, Town Hall 4, not Builder Base’s Builder Hall 4. The plan assumes you have built the available defenses and repaired your Clan Castle. If you have fewer pieces, place the structures you own and complete the design as they unlock. No low-level base is immune to a stronger attacker, but a clear arrangement makes defensive improvements easier to judge.
Town hall 4 layout: build the wall outline
Use a clear area of the editor. Treat each wall as one grid tile; coordinates below are relative to the upper-left corner of the main outline. The first number increases to the right, the second downward. A building described as x=2–4, y=2–4 occupies all nine tiles in that rectangle.
- Make a 19-by-14-tile rectangular wall outline: place the top and bottom rows from x=0 through 18 at y=0 and y=13. Place the side walls at x=0 and x=18 from y=1 through 12. That uses 62 walls, with no doubled corners.
- Place the remaining 13 walls in a horizontal line from x=3 through 15 at y=-2, one empty tile above the top wall. This extra wall in the TH4 village plan adds a barrier on that approach; it does not close another compartment.
- Place the buildings in the table inside the outline. Do not put a wall or trap on a building tile. The 17-by-12 interior is one open compartment, so troops that break in can move between buildings.
The town hall 4 base layout is easiest to copy if you count the walls first and leave the outer buildings until last. You can rotate the finished design, but rotate all coordinates and traps together.
| Building | Tiles inside the outline |
|---|---|
| Town Hall, 4×4 | x=7–10, y=5–8 |
| Mortar, 3×3 | x=4–6, y=5–7 |
| Air Defense, 3×3 | x=11–13, y=5–7 |
| Archer Towers, 3×3 each | x=2–4, y=2–4; x=14–16, y=9–11 |
| Cannons, 3×3 each | x=14–16, y=2–4; x=2–4, y=9–11 |
| Clan Castle, 3×3 | x=8–10, y=1–3 |
| Two Gold Storages, 3×3 each | x=5–7, y=1–3; x=5–7, y=9–11 |
| Two Elixir Storages, 3×3 each | x=11–13, y=1–3; x=10–12, y=9–11 |
This town hall 4 base layout uses the two Cannons, two Archer Towers, one Mortar, and one Air Defense available at this level. Put the two Bombs at (6,4) and (12,4), and the two Spring Traps at (6,8) and (12,8). Those are free tiles inside the perimeter. Traps only help if an attacker walks over them, so check replays before treating their locations as permanent.
Finish the outer village
Put your remaining collectors, mines, Army Camps, Barracks, Laboratory, and Builder’s Huts outside the walls. Spread them around the four sides without overlapping the extra wall line. Start with resource collectors on the east and west, place army buildings toward the south, and use huts in remaining legal spaces. Their positions in this level-four base plan are flexible: leave enough room to select and upgrade them, and do not rely on a building to form a continuous wall.
This th 4 base has a clear tradeoff. The town hall 4 layout prioritizes its core. Its single compartment keeps the main defenses close to the center, but once ground troops enter, no interior wall separates the storages. Moving one storage outside gives you room to adjust the core, at the cost of exposing that resource. Keep the Town Hall protected if avoiding a Town Hall star matters more than saving every collector.
Why these defenses belong together
The Mortar damages groups of ground troops, but has a blind spot close to itself and cannot target air units. The Cannons and Archer Towers help cover the core while the Mortar shoots approaching groups. A Cannon cannot shoot air; the Archer Towers can. The central Air Defense adds protection against flying troops, but it cannot deal with ground attackers.
Wall Breakers can open a path through the perimeter, and Giants tend to attack defenses. Bombs and Spring Traps can punish troops approaching through the open interior, although attackers will not always take the route you expected. Air units bypass walls entirely, so a tidy wall count is no substitute for upgrading Air Defense.
For this th4 base layout, request Clan Castle reinforcements if your clan can supply them. They can help defend when the castle is active, but donated troops and attacker choices vary. During upgrades, a defense under construction cannot contribute normally; consider upgrading one key defense at a time instead of making every side quiet at once.
Adjust after a replay
Use this Town Hall 4 home base design as a starting point, not a promise of a perfect defense. Watch where attackers enter, which buildings they destroy without being targeted, and whether the traps are triggered. If most ground attacks approach from below, try moving the loose 13-wall line to that side, keeping one tile between it and the main perimeter.
After building your level-four Home Village, count 62 perimeter walls plus 13 outside, confirm that all six defenses and four traps are placed, and inspect the editor for overlaps. Save the layout, watch a defense, then choose an available Air Defense or Mortar upgrade that addresses the weakness you observed.